Crochet Corner: How To Create A Slipknot and Chain
May 25, 2023
If you’ve ever wanted to learn how to crochet, now is the time to do so! In this article, I will be writing a step-by-step guide on how to make a slip knot and how to crochet a simple chain. These are the basis of many crochet patterns and are pretty easy once you catch on.
Materials:
- Yarn
- Crochet hook
Slip Knot;
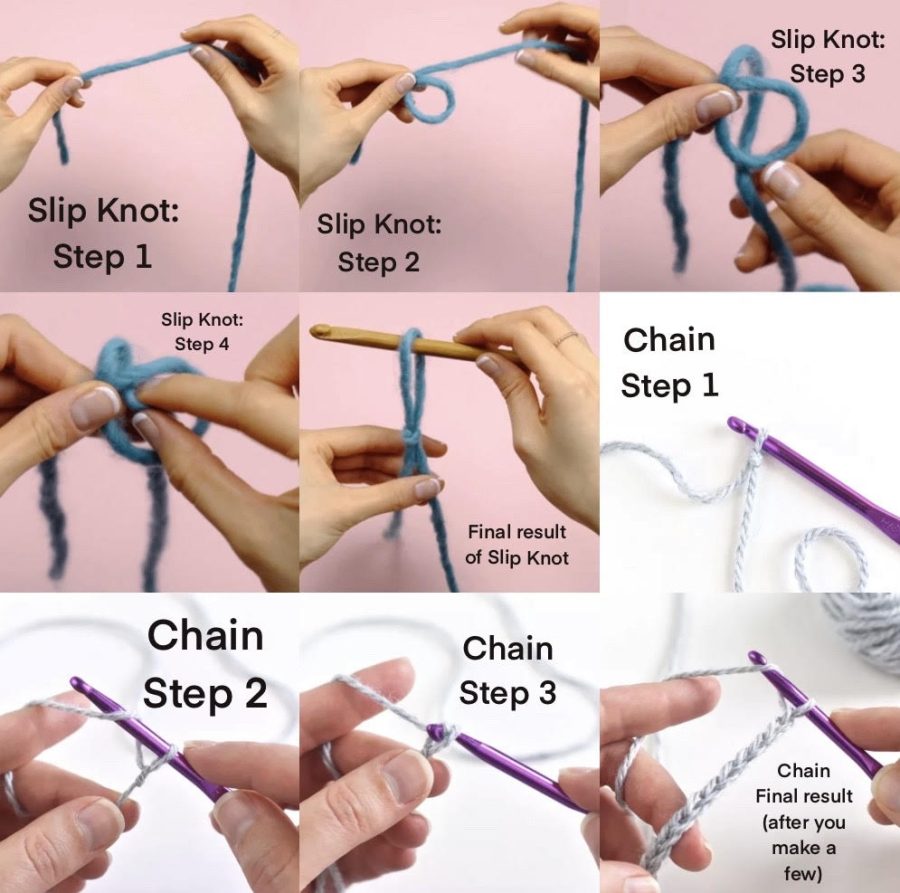
- Start by grabbing the tail of the yarn, and pull a piece of yarn about the length of your phone, hold it with both hands
- Next, you will make a loop
- Place the excess yarn at the back of the loop you’ve just created
- Use your fingers to pull the yarn through the loop
- Slip the loop onto your crochet hook and pull the ends of your knot to tighten it
Now that you’ve created your slip knot, you are ready to start crocheting, for the purpose of starting with the basics, You will learn to make a chain, the term used for a simple line, which looks kind of like a braid.
Chain;
- First, you’ll want to make sure your hand placement is correct; grasp the crochet hook in your right hand, and the yarn in your other hand
- To begin, loop your working yarn over the hook, starting from the back and bringing it to the front, this term is called “yarn over”
- Next, you will rotate your hook a little so the actual hook part is facing the floor, and pull the yarn through your loop.
- This creates your first chain
- Repeat this process until you have enough chains for your pattern
Creating slip knots and chains is an important yet basic skill to crochet. Once you get the hang of the hand placement and these 2 skills, you can move on and start learning different stitches. I recommend learning single crochet first, as it is the most common and simplest stitch to learn. I will be creating more crochet tutorials as such in the following school year, so if you are interested in this, then look forward to that.


